

Each and every concrete dome we build is designed to withstand almost any event. And that strength starts at its very foundation. But before we dig into the details, let’s take a look at what makes concrete domes so incredible.
Compelling Reasons to Choose A Concrete Dome
Whether building a survival shelter, year-round grow room, storage facility, residential complex, or single-family home, there are several reasons to consider concrete domes over conventional construction.
First, concrete domes are incredibly safe and secure, meeting FEMA requirements as official safe rooms against various natural disasters, including tornados. And the inherent load-bearing characteristics of a dome make it one of the strongest structures known to mankind.
Second, concrete domes are capable of being architecturally sized and customized to fit any need imaginable. With various floor plans extending well beyond a singular sphere-shaped structure, concrete domes are incredibly versatile and flexible for a variety of commercial or residential applications.
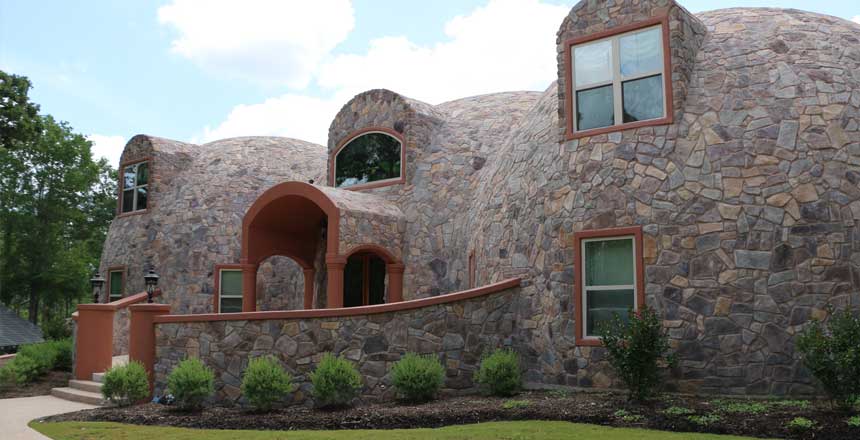
Third, concrete domes offer levels of efficiency and low maintenance that are nearly impossible to match. The high-grade insulating foam used during the construction process, combined with a dome’s inherent properties, leads to saving thousands of dollars in heating and cooling expenses over time. And a dome’s outer airform—left untreated—can last as long as 30 years or more. With the addition of paint, tile, brick, or stone, this all-weather shell will last even longer.
These are all compelling reasons to consider a concrete dome but lead to our fourth and final point of consideration: the dome construction process itself.
At Brooks Construction, we have dedicated an entire division of our company—known as KingDome Builders—to building these solid and long-lasting structures. And though our dome construction process is simple and proven, we find that many people still ask the question: how in the heck do we build our concrete domes?
We’ll begin to answer that question in the remainder of this article, the first in a series of articles that will unpack each phase of our concrete dome construction process.
In this scenario, we’ll be looking at concrete domes as residential homes. However, regardless of a dome’s application, our process is the same. So let’s get building!
Read our complete 5-part series here:
Part 1: The Foundation (you are here!)
Part 2: The Airform
Part 3: Polyurethane Foam
Part 4: Steel-Reinforcing Rebar
Part 5: Shotcrete
Choosing A Floor Plan
Like any new home construction project, you have creative control over your dome when working with KingDome Builders from Brooks Construction. Your dome can be multilevel, contain multiple adjoining domes for additions such as garages, bedrooms, etc., and even include a basement. Choose a floor plan that will best suit your needs. Sizes range from tiny cottages to football stadiums—pretty much anything you can imagine, we can build. The placement of rooms, levels, piping, etc., is all up for discussion.
Preparing the Area
Once you have chosen where to build a dome home and decided on a floor plan, it is time for us to prepare the building site for the foundation.
We prepare concrete dome sites by laying a “non-expansive fill” such as sand or gravel, creating a stable building ground for your dome home. When laying concrete, it is common to use a vapor barrier to help prevent moisture from entering the concrete slab. There are two vapor barrier options: the first is applied before laying the fill (mentioned earlier). A sheet of heavy plastic is often laid beneath the sand or gravel fill to protect from moisture. The second option is to apply a vapor barrier coating after the concrete has been laid, which we’ll discuss later on.
Preparing the Foundation
Once the pad area has been treated with a non-expansive fill, we prepare the ground for the concrete foundation with the following procedure:
- Mark the center point of the building site with a wooden stake or similar method. We use this as a benchmark to ensure the foundation is level throughout.
- Dig a trench within the walls of the perimeter as deep as the frost line. This trench will keep your home stable and ensure that no animals can dig underneath the home.
- Place plywood strips around the foundation perimeter and secure them with stakes about one foot apart. These will act as the boundary for the concrete foundation.
- Lay rebar in a horizontal grid pattern inside the perimeter. Steel rebar gives the dome the strength needed to withstand any disaster and it helps to absorb tension forces within the concrete.
- Finally, we work with licensed electricians and plumbers to lay the utility, piping, and sewage lines within the foundation.
Pouring the Concrete
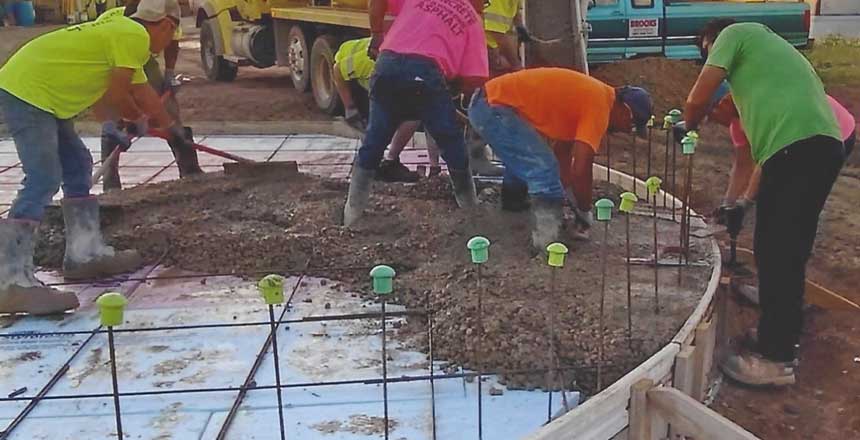
The final step (and our personal favorite) is pouring the concrete! While the concrete for the foundation is wet, we place any vertical steel bars inside the concrete slab that are required for the chosen design. They will stick up out of the dried concrete and allow for the construction of walls and other features later on in the process.
After the concrete is poured, it’s time to apply a vapor barrier coating, if that is what you have opted to do.
Finally, we cover the concrete slab with a plastic sheet for a few days to allow it to cure properly.
Once the steel-reinforced circular concrete foundation is complete, we’re ready to install custom-fabricated airforms that will form the dome structure. And we cover that process in more detail in our next article.
Tour Our Demo Dome
In the meantime, if you’d like to learn more about concrete domes from the team that builds these amazing structures or schedule a tour of our demo dome in Sioux Falls, click here or call 605-368-5477 today!
