Step 4: Steel-Reinforcing Rebar (How We Build Our Concrete Domes Series)
Since prehistoric times, dome homes have been around because of their inherent strength and association with sacred symbolism. They have been made from various materials through the millennia, but modern domes are made from concrete. As a result, they are incredibly strong and known for their ability to withstand natural disasters. This is mainly because concrete domes utilize steel-reinforcing rebar, which absorbs outside pressures and tensions in the concrete.
Previous articles outlined the dome construction process, starting with the foundation, followed by airform inflation and insulating polyurethane foam application. The rest of this article will examine the fourth step of the dome construction process: applying steel-reinforcing rebar.
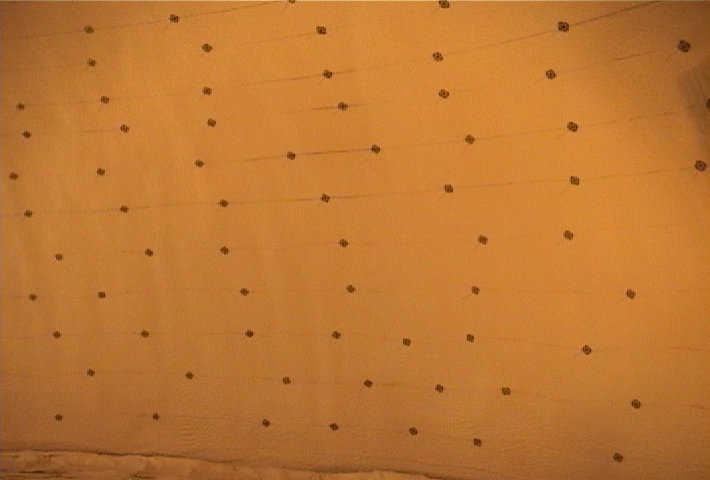
Before we can attach any steel-reinforcing rebar to the dome’s interior walls, we must first strategically place rebar hangers throughout the internal structure. The rebar hangers are thin, 2-inch square steel plates with wire welded on one side and protruding barbs on the other.
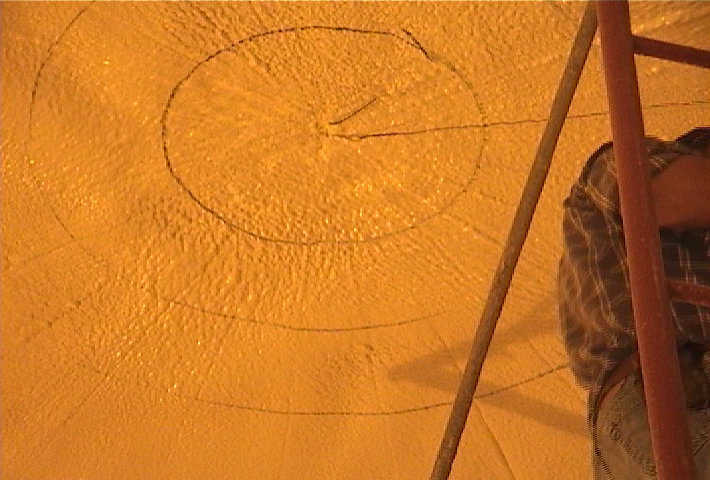
We begin by pressing the barbs of one rebar hanger into the polyurethane foam at the top center of the dome, securing it in place by spraying a thin layer of foam over the hanger. This first hanger serves as a marking guide.
Top center hanger with wire/string attached is used as a guide to mark for rebar hangers over the entire interior surface.
Next, we tie a piece of non-stretch string to the hanger with a marker or chalk on the other end. Rotating the string 360º along the inside circumference of the dome, we mark spots for additional hangers from the floor to the top center. The vertical and horizontal spacing of the hangers is predetermined based on the size of the dome, as is the gauge of rebar.
Layout pattern of rebar hangers.
Installing Steel-Reinforcing Rebar
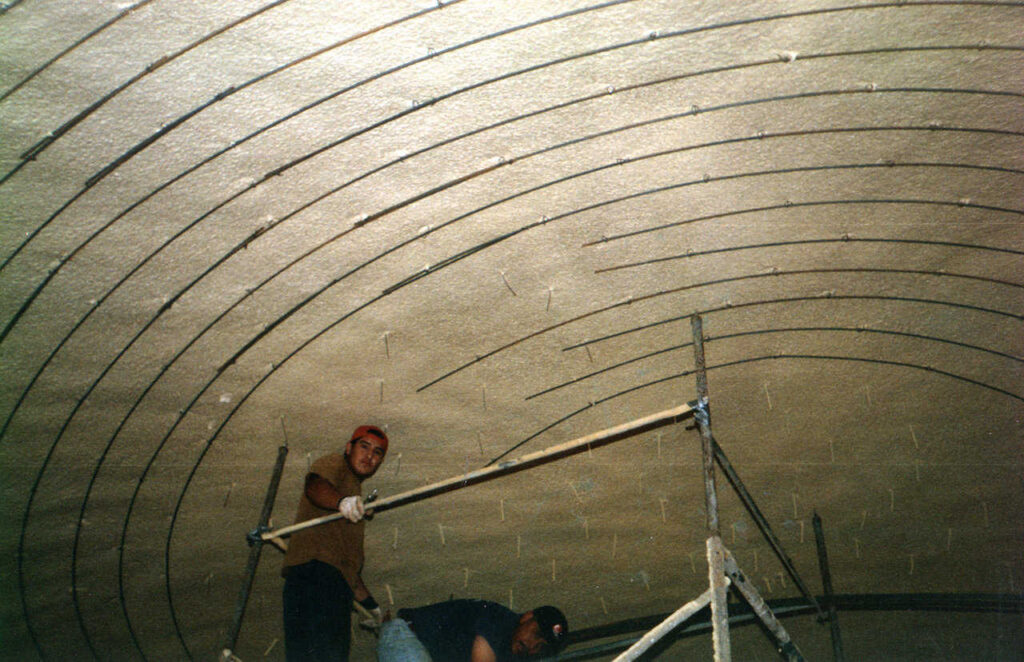
Once all hangers are in place, we secure horizontal rebar hoops from floor to ceiling. The wires attached to each hanger allow us to tie the steel-reinforcing rebar into place. These hoops function similarly to the metal bands of a wooden barrel. The first hoops installed are those that cross with the vertical rebar that protrudes from the footing. And tying into the footings is what secures the dome safely to the concrete foundation.
Crew members attaching hoop rebar to rebar hangers.
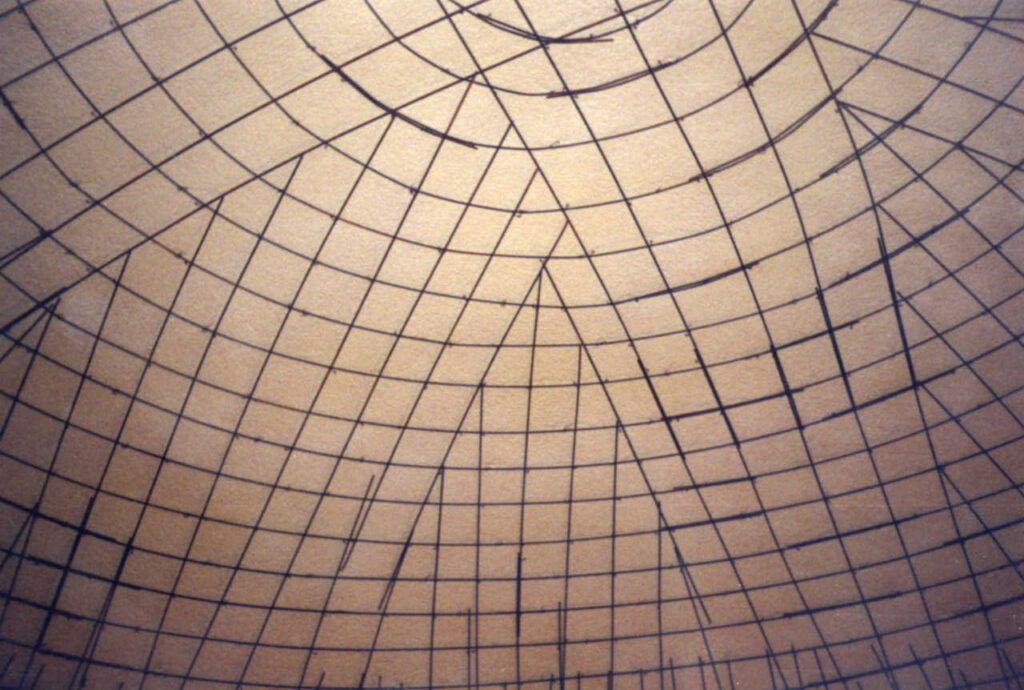
After the horizontal hoop rebar is in place, it’s time to install the vertical rebar. This placement order is important because the dome will attempt to buckle beneath the pressure as we add the vertical rebar, and the hoop rebar prevents this from occurring. In the end, the resulting rebar mesh provides the dome with incredible strength, allowing it to stand up against natural disasters, tornadic winds, even fallen trees and flying debris.
With the vertial steel reinforcement in place, we are ready for shotcrete application.
When all of the steel-reinforcing rebar is in place, we’re ready to apply shotcrete. We’ll cover that step in the next article in this construction series.
Tour Our Demo Dome
If you’d like to learn more about concrete domes from the team that builds these amazing structures, schedule a tour of our demo dome in Sioux Falls by clicking here or calling 605-368-5477 today!