

Building a concrete dome home means building a home that outlasts and outperforms almost every other conventional option today. And there are only 5 essential steps to make it happen. In this article, we’ll take a look at what it takes at each step to achieve the ultimate in safety, efficiency, and durability.
Step 1: Build the Foundation
The first step in building a concrete dome involves laying an insulated foundation and footing. This is an essential step in providing stability and insulation to the structure, which is important for ensuring the longevity of the dome.
Read More About Concrete Dome Foundations
Why Use an Insulated Foundation for Building a Concrete Dome?
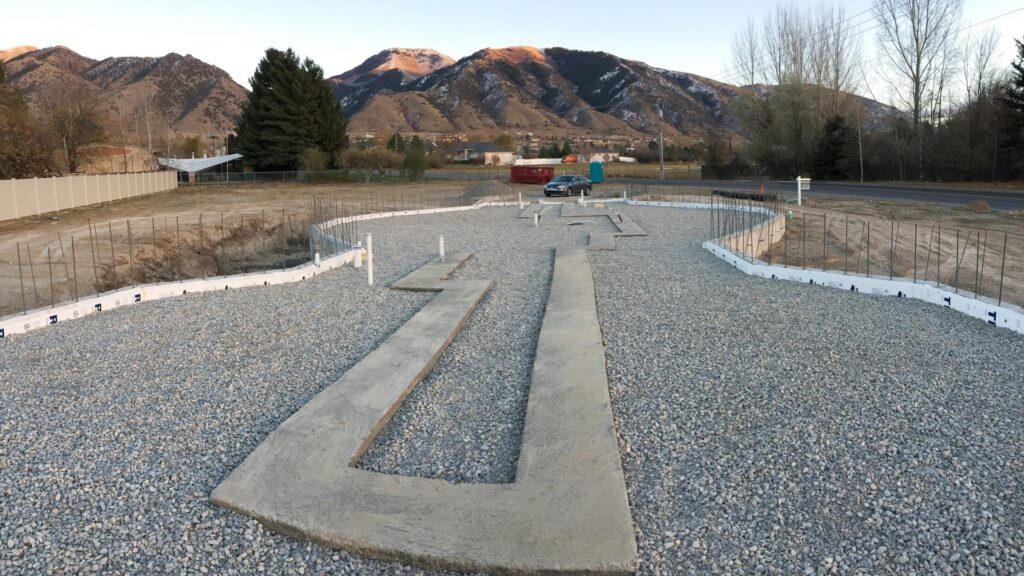
One of the main benefits of using an insulated foundation and footing is that it prevents moisture from entering the structure. If your area sees high levels of rainfall or snowfall, moisture can easily seep into a building’s foundation and cause damage over time. But with a moisture barrier and insulation, your concrete foundation becomes a tool for interior climate control instead of a weak spot for mold growth and energy loss.
An insulated foundation and footing also help maintain a consistent temperature inside the dome structure. During hot weather, the insulation keeps the interior cool, while it also helps to keep the interior warm by preventing heat loss through the ground during the winter. This added temperature control can lead to significant energy savings over time, as less energy is required to maintain a comfortable temperature inside the structure.
Could The Foundation Be Built for Less?
Cost and construction time are both concerns for any project. So why bother adding extra insulation to the foundation? With the superior efficiency of concrete domes, the cost of insulation is generally offset by the energy savings over the lifetime of the building. Many modern construction methods have significantly reduced construction time as well.
Step 2: Inflate the Airform
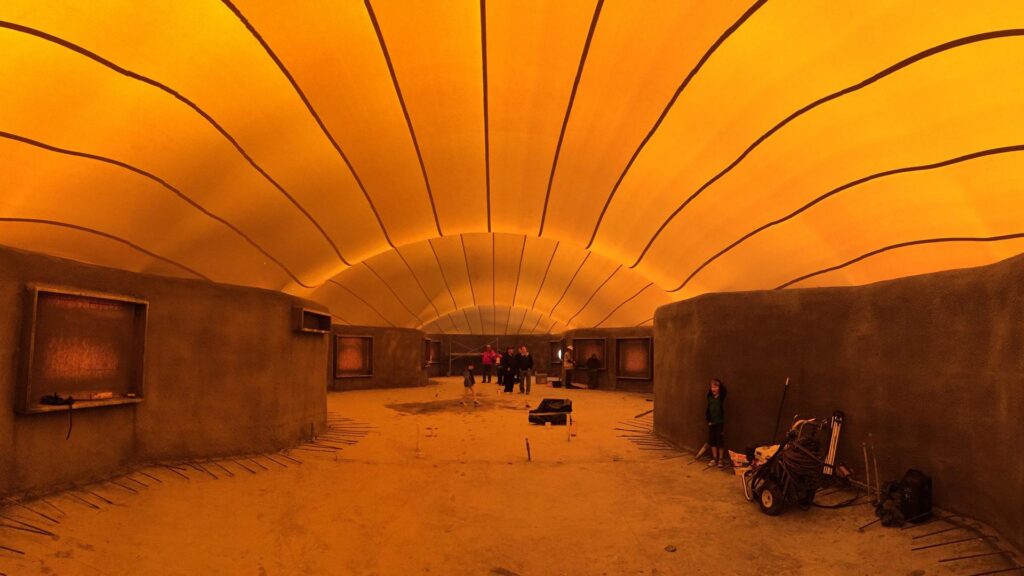
The second step in building a concrete dome is inflating the PVC airform. This inflatable form provides shape to the dome structure while it is being built, as well as an external protective covering for the insulation and shotcrete.
The use of an airform is an innovative technique that significantly reduces construction time and costs. It also ensures that the dome structure remains airtight and efficient. Inflating the airform allows the dome structure to be built quickly, as the outer shell is already in place, and the concrete can be easily sprayed to form the walls, even in cold or rainy weather. This not only makes the construction process faster and easier, but it also reduces labor costs.
Read More About the Inflatable Airform
Is the Airform Strong Enough?
Our airforms are made of durable PVC material, which is heat- and wear-resistant. It’s designed to withstand the pressures of the construction process, as well as the stress of severe weather and prolonged sun exposure.

Airforms create a uniform surface when spraying the insulation and concrete, ensuring an even layer for better strength and energy efficiency. An even coating keeps the dome stable. Additionally, because the airform is completely custom, it allows for a variety of shapes and sizes to be built according to your specific needs and desires.
Step 3: Insulate the Airform
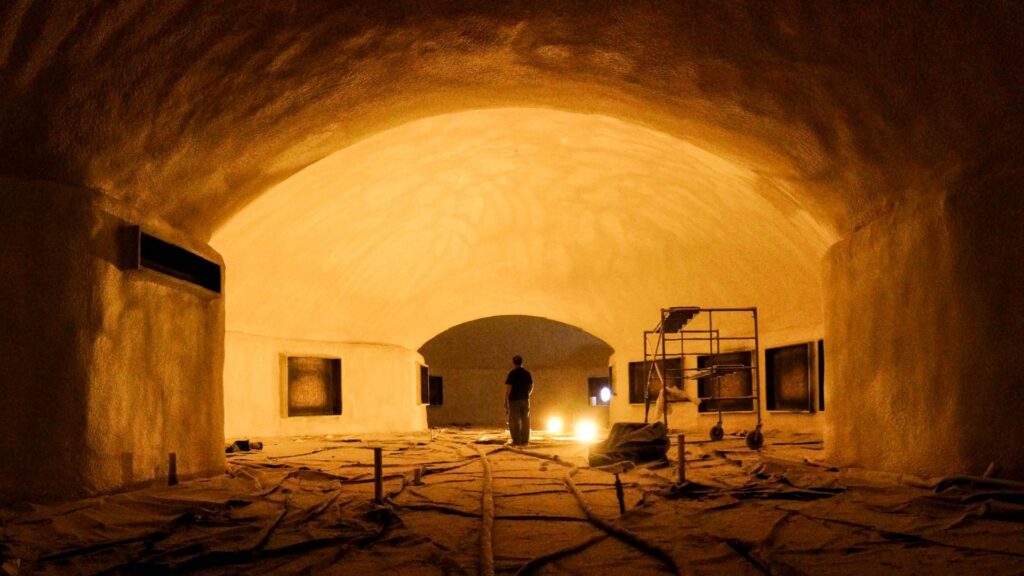
The third step in building a concrete dome involves spraying polyurethane insulating foam on the interior of the airform. This is an important step that provides a thick layer of insulation while also creating an airtight seal between the interior and exterior of the dome. Spray foam insulation reduces energy costs and maintain a comfortable temperature inside the structure.
Why Build a Concrete Dome with Spray Foam Insulation?
Polyurethane insulating foam is ideal for use in dome construction because it adheres well to almost any surface, fills gaps easily, and is lightweight while still being strong and durable. The foam insulation is sprayed onto the interior of the airform, which forms a continuous layer on the inside surface of the dome’s shell during construction.
This insulation layer creates an airtight building envelope that makes concrete dome homes much more energy-efficient than traditional homes, as it effectively reduces air leakage and improves the home’s heating, ventilation, and air conditioning (HVAC) performance. It additionally helps dampen noise levels inside the structure, which can make the home more comfortable for occupants.
Isn’t Spray Foam Insulation Expensive?
Spray foam is expensive compared to conventional fiberglass insulation. However, the energy savings provided by polyurethane foam insulation can offset the upfront cost over time, making it a cost-effective choice in the long run. In many cases, the energy savings of a concrete dome building can completely cover the cost of construction in less than two decades, even for massive structures.
Step 4: Install Steel Rebar
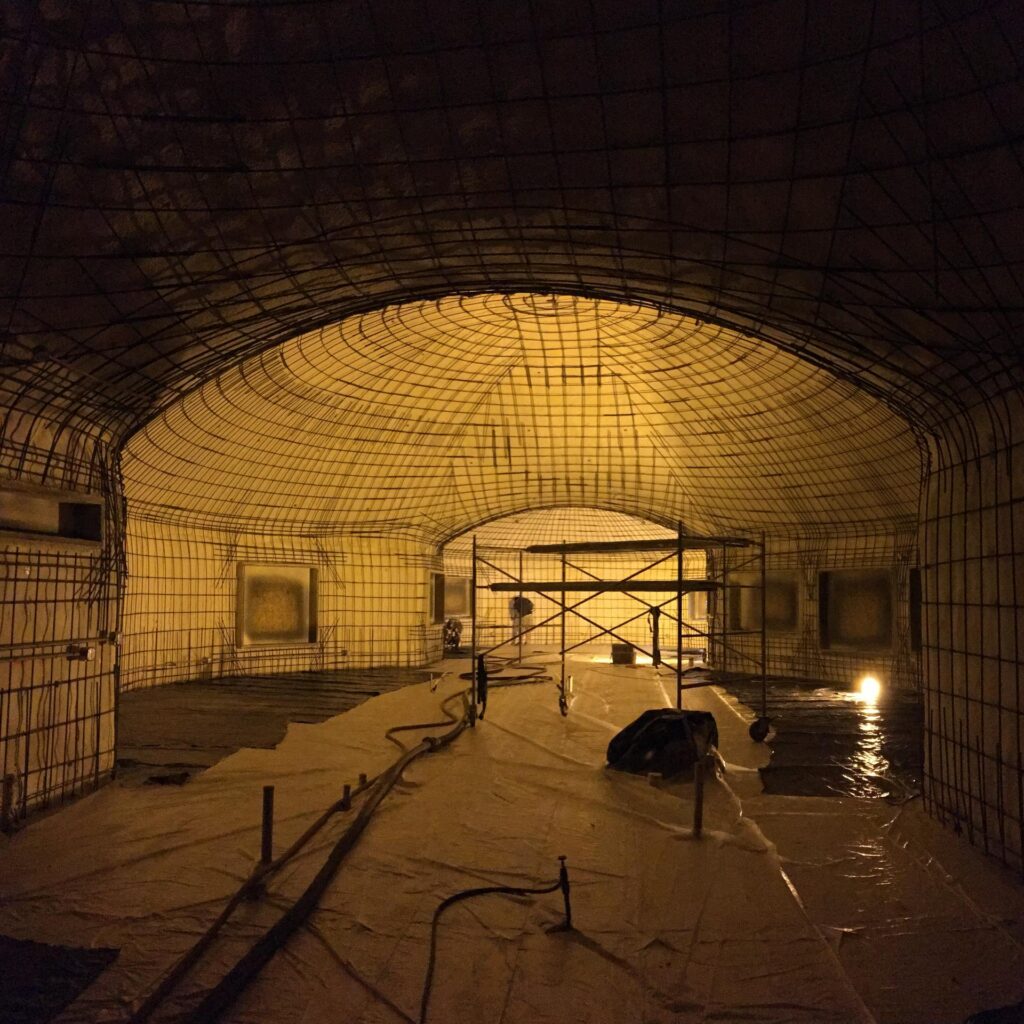
The fourth step in building a concrete dome involves installing steel rebar in both horizontal lattices and vertical webbing. This step is crucial to the strength and stability of the dome structure. This rebar lattice ensures that the dome can withstand heavy loads without cracking or crumbling.
Steel rebar is an essential component used in many construction projects because of its strength, durability, and flexibility. It is used in both horizontal and vertical webbing to form a strong framework throughout the dome structure, which helps to distribute weight evenly and prevent cracks from forming. Domes naturally distribute added weight throughout their structures, but the rebar increases that strength dramatically.
Read More About Rebar Reinforcement for Building Concrete Domes
What’s the Benefit of Steel Rebar in Dome Homes?
Steel-reinforced dome structures are far more resistant to natural disasters such as earthquakes and high winds. This makes building concrete dome homes a popular choice in hurricane-prone areas. Compared to traditional homes, dome homes are much stronger and thus have the potential to last much longer, saving money on repairs and replacement costs in the long run.
Is There a More Affordable Option?
Rebar comes with a higher construction cost, but it’s a small price to pay for the added durability and structural integrity that it provides. And while there are some alternatives that could provide the same strength as steel rebar, few are as cost-effective at this time.
Step 5: Install Shotcrete
The fifth step in building a concrete dome involves spraying concrete over the steel rebar. This is an important step that helps to bind the components of the structure together and create a strong, durable shell with superior insulation qualities.
Read More About Shotcrete in the Dome Construction Process
Why Use Shotcrete?
Shotcrete is a special mixture of concrete that can be sprayed with high-pressure applicators. Concrete is an ideal choice for use in dome construction because it is extremely durable and resistant to weathering, making it capable of withstanding extremes of temperature and humidity.
Shotcrete also has excellent insulating properties, keeping temperatures inside the home more consistent. Additionally, shotcrete requires very little maintenance over time, which makes it a cost-effective choice for homeowners who want a long-lasting home.
Won’t the Extra Weight of the Concrete Cause Structural Issues?
One potential objection to using concrete in dome construction is its weight. However, this issue can be mitigated by using lightweight cellular concrete or other lightweight forms of aggregate. As a result, homeowners can enjoy all of the benefits of concrete without having to worry about the added weight on their roof structure.
Start Building a Concrete Dome Home of Your Own
So what do you think? Ready to build yourself a dome home? If you’re ready, schedule an appointment today to start planning your next dream home with KingDome Builders. We would love to help you feel safer, spend less on energy bills, and create a home that captures your imagination!