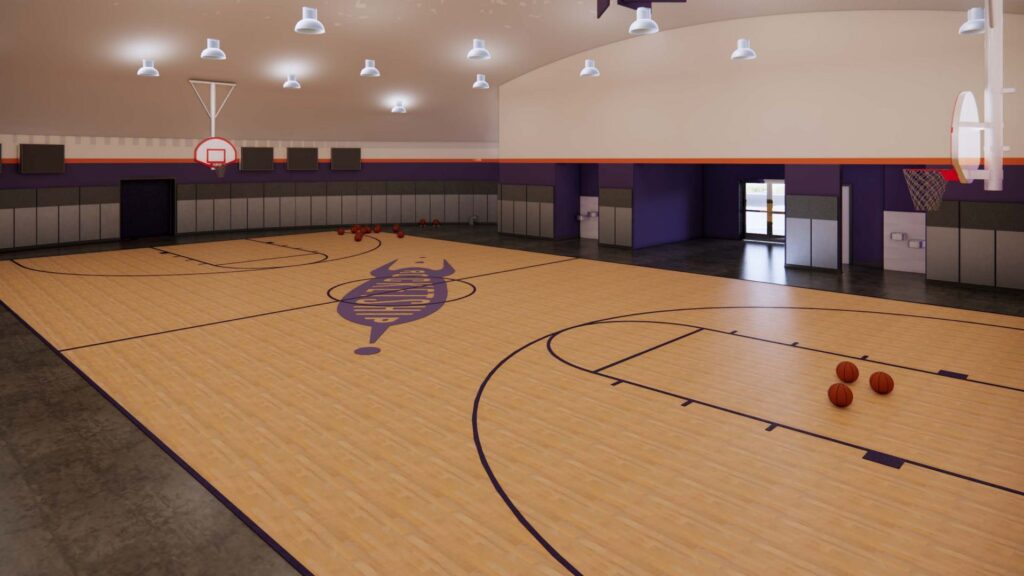
The word is out: concrete domes make excellent gyms and events centers. They’re popular for schools, community centers, and churches. And they’re gaining traction nationwide for their ability to host large gatherings without fear for safety or security. And stem wall domes are especially well-suited for these applications.
What Is A Stem Wall Dome?
Concrete domes are often hemispherical structures, with the curve of the dome starting at the foundation. But a stem wall dome instead utilizes a cylindrical or polygonal base on the footings, with the dome structure sitting on top of this base. This raised dome changes some of the design requirements of conventional concrete dome structures, but it also comes with specific benefits.
The Original Designs and Methods
When construction firms started building stem wall concrete domes, most were built in a two-stage process. First, the stem wall would be constructed, and then the dome structure would be added on top. The two-piece finished product provided many of the benefits of a conventional hemispherical or prolonged ellipsoidal dome, but the separate stem wall wasn’t always ideal.
Many early stem walls were built with concrete blocks. The dome building would maintain a reasonable amount of strength, but it wasn’t the same as a single-unit structure. Attaching a dome to the top of a concrete block wall would leave gaps, reduce rigidity, and diminish the airtight and watertight capabilities of true domes.
Another option was poured or prefabricated concrete sections or a full poured-concrete ring base. In this case, there was less opportunity for water penetration. But the joint between the stem wall and the dome still posed issues.
Many dome contractors would mitigate some of these problems by filling and sealing blocks with spray foam and reinforcing with rebar. Others would treat the two separate components as a single structure when finishing the interior, spraying foam and shotcrete throughout the structure to essentially integrate the two.
But in both cases, the construction and finishing processes were slowed since two separate contractors would need to work on the project.
This all changed with one innovative solution.
The Modern Transition Ring Design
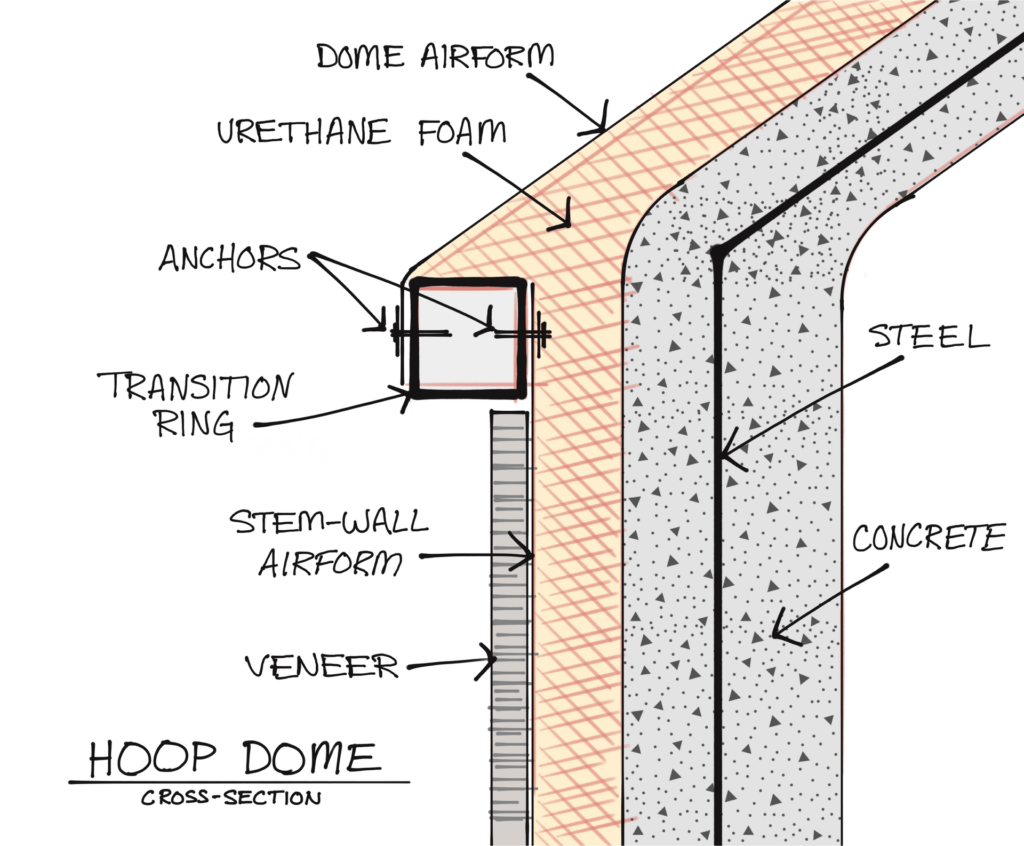
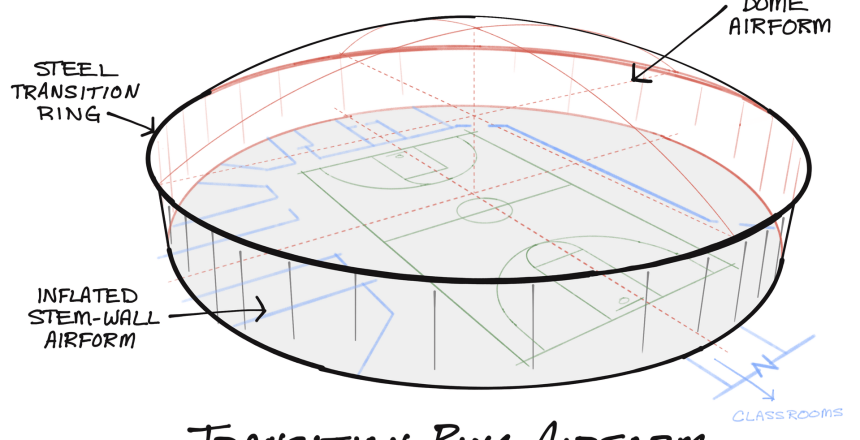
Today, engineers have discovered the key to providing a unified structure: the steel transition ring.
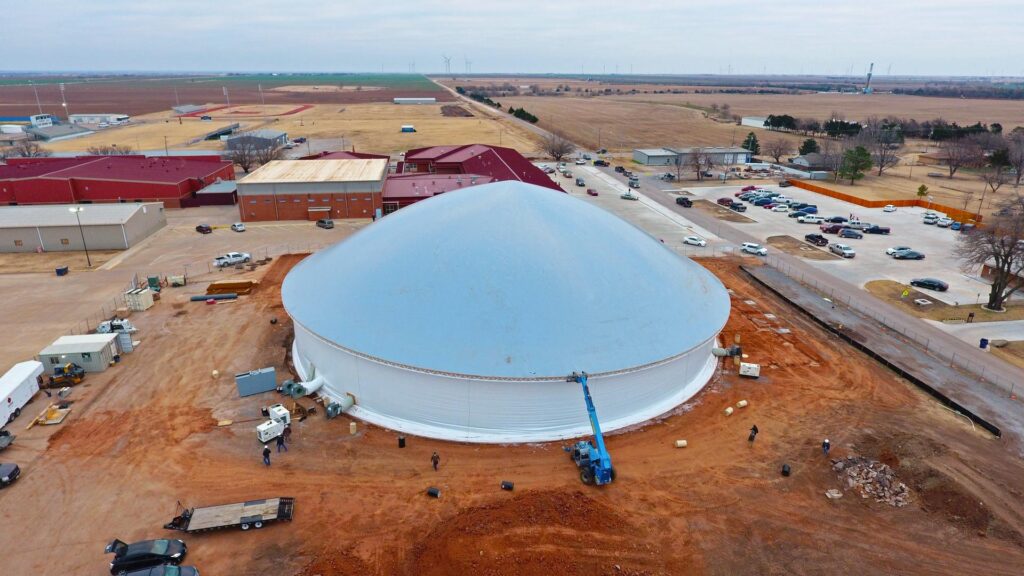
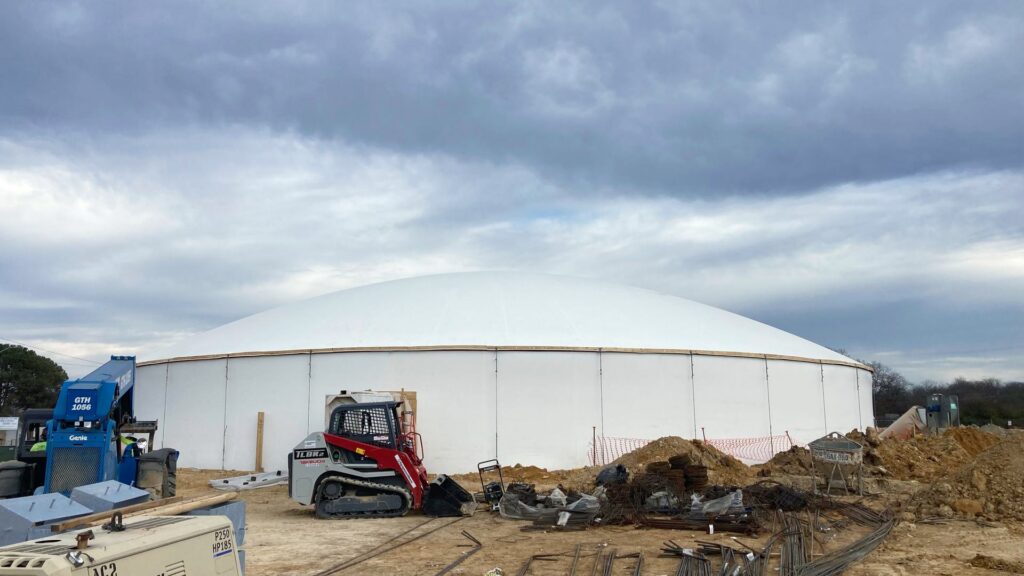
Stem wall domes built with steel transition rings allow dome contractors to use a single membrane to complete the entire structure. The method eliminates the inherent gap and provides complete protection against weather, moisture, and temperature concerns.
There are three main components in the transition ring design: The stem wall membrane, the transition ring, and the dome membrane. And it takes just a few adjustments to the more familiar process of building a conventional dome to make the transition ring design work.
The Three Components of Transition Ring Stem Wall Domes
| The Stem Wall Membrane | The Transition Ring | The Dome Membrane |
|---|---|---|
| A cylindrical PVC membrane that attaches to the footings and then to the transition ring. When inflated, the membrane provides the form for the vertical stem wall at the base of the dome. | This steel ring consists of one or more square-tubing rings welded to match the diameter of the footing. For large structures, the multiple rings are joined together and reinforced with trestle braces. | The top of the structure uses a hemispherical dome membrane attached to the transition ring. The height of the dome is typically between ⅕ and ⅙ the diameter of the structure for a lower profile. |
Advantages of the Transition Ring Dome
Conventional domes offer many advantages, but the transition ring stem wall dome is unique in its function and form. Both its design and its process give it an edge over other dome options for certain building purposes. It’s particularly well-suited for gymnasiums, schools, and arenas. Here’s why:
Single-Piece Construction
With older stem wall domes, construction often took place in two stages. The separate stem wall and dome made the overall structure less sturdy against natural threats like weather and earthquakes.
The transition ring design solves this shortcoming. With a single-piece design now possible, these domes have the same strength as dome-only designs.
More Efficient Project Management
Project management is inherently easier when you only have one crew to work with. And by eliminating the two-stage construction of past designs, new stem wall dome buildings keep the construction process as simple as possible. No scheduling separate crews, and no waiting for one crew to show up after the first is done. It all happens at once, with no shuffling or confusion.
Easier for Doors and Windows
Stem walls make adding doors or windows to a design easier. Domes typically require a popout dormer or unique doors and windows. But stem wall domes can work with standard doors much more easily. For large projects, double-door designs and airlocks can retain conventional design processes while still offering the safety and energy efficiency of a dome.
Low-Profile Design
The low slope of concrete dome arenas with stem walls makes it less visually jarring against other buildings, but it also provides a more practical interior space for gymnasiums or churches.
All the Benefits of Concrete Domes
The single-piece build process maintains the inherent strength of concrete dome buildings. Severe weather conditions don’t phase these designs, and moisture is no concern with the airtight design.
How Do You Build a Stem Wall Dome?
1 – Pour Footings and Foundation
Every concrete dome building starts with an insulated foundation placed on top of structural foundations designed specifically for the weight of the structure. The insulation, along with a vapor barrier, keeps the concrete dry and temperature-stabilized, adding to the energy efficiency within the structure.
2 – Attach Stem Wall Membrane
The cylindrical stem wall membrane is anchored to the footings with steel bolts. This is a crucial step in the construction process, since immense pressure will pull on the membrane during inflation. This airform section is patterned to be slightly smaller than the target dimensions, but air pressure will stretch it into the desired shape.
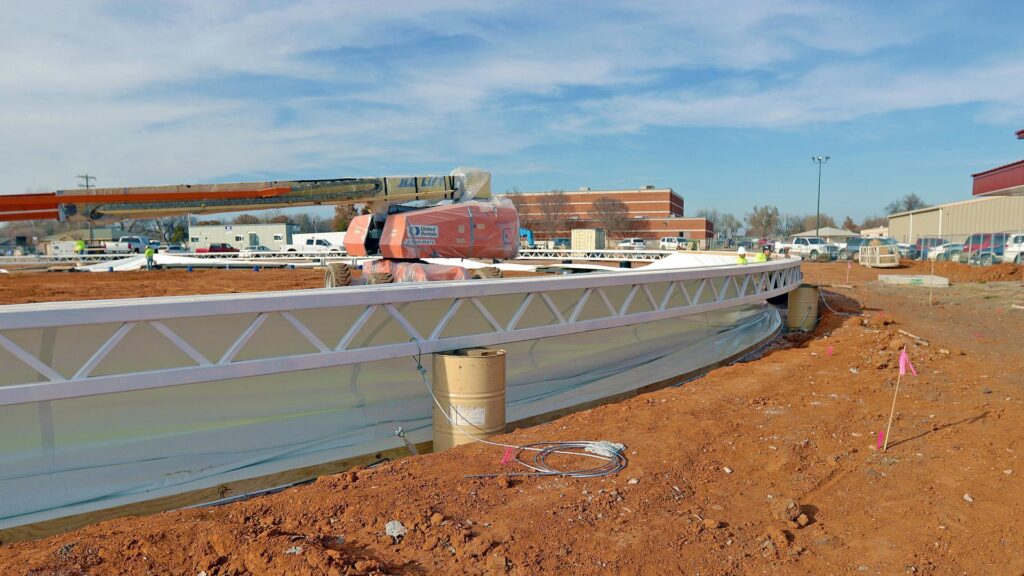
3 – Attach Transition Ring
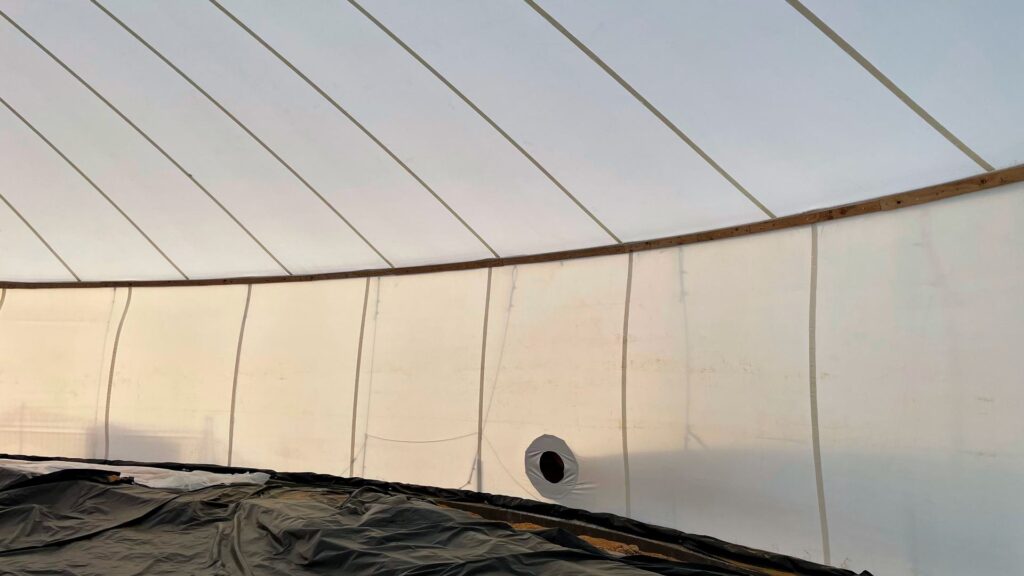
The stem wall membrane is then attached to the steel transition ring, which consists of one or more steel-tube rings welded to match the diameter of the foundation. For small structures, both membranes will be attached to the outside of a single steel ring. For larger structures, multiple steel rings will be joined together with trestle braces. The stem wall membrane attaches to the inside ring, while the dome membrane attaches to the outer ring. This creates a small eve on the exterior of the stem wall dome.
4 – Attach Dome Membrane
The final component of the form is attached to the transition ring using steel anchors. Again, this stage is crucial since the interior air pressure could tear the membrane off of the transition ring if done incorrectly.
| Transition Ring Stem Wall Dome: Construction Steps |
|---|
| 1 – Pour Footings and Foundation |
| 2 – Attach Stem Wall Membrane |
| 3 – Attach Transition Ring |
| 4 – Attach Dome Membrane |
| 5 – Inflate Entire Structure |
| 6 – Apply Insulation, Rebar, and Shotcrete |
| 7 – Build Stem Wall Veneer |
5 – Inflate Entire Structure
With both membranes secured to the transition ring, and the stem wall membrane secured to the foundation, it’s time to inflate the airform. The lift from this inflation can start pulling the transition ring and stem wall membrane off the ground with as little as one-tenth of the total pressure required to completely inflate the structure.
This stage may take only a few hours to complete, with the help of a telescoping forklift to stabilize the transition ring. But the stem wall membrane will take a couple days to completely stretch into shape for finishing.
The air pressure to inflate a large dome (150 feet in diameter or more) is incredible. The pressure at 2 inches of water column is often 36 times the total weight of the structure itself. That makes it easy to lift the components and keep them at the desired tolerances until the interior construction is complete.
6 – Apply Insulation, Rebar, and Shotcrete
With the airform completely inflated, pressurized, and stretched to shape, it’s time to complete the interior construction process. This stage is much the same as a conventional concrete dome:
- Several inches of polyurethane spray foam is sprayed on every interior surface.
- Steel rebar latticework is anchored in the spray form.
- Several inches of shotcrete is sprayed over the rebar, completely covering the steel reinforcement.
When completed, this interior will provide incredible energy efficiency, a weatherproof seal, and unrivaled strength against severe weather and disasters.
7 – Build Stem Wall Veneer
The final step to the dome construction is adding a veneer to the stem wall. In many cases, the exterior is covered with bricks up to the eve. This provides a clean look for the stem wall dome, as well as a more conventional touch to the overall design.
Is a Stem Wall Dome Structure Right for Your Project?
There are many different types of domes, and each structure is a custom project. But is a stem wall dome the right choice for your project?
Most stem wall domes are used for arenas, convention centers, and school buildings. They provide ample floor space for activities and gatherings. And their more conventional design makes them easier for architects and designers to work with.
If you need to build a large structure and want the strength of a dome with the functionality of a stem wall, KingDome Builders is here to help. Our skilled team designs and installs domes of all shapes and sizes, including stem wall domes. Let’s sit down and figure out the perfect solution for your next project. Make an appointment today, or come visit us to see a model dome home in person.

